Showing posts with label Panasonic. Show all posts

Friday, December 12, 2014

Nicely Edit Panasonic HC-X920 AVCHD in iMovie

Follow this guide below you will get to know the MTS to iMovie solution. Now keep on reading the info about how to convert Panasonic HC-X920 AVCHD to iMovie for editing without rendering.

Edit Panasonic HC-X920 AVCHD in iMovie

I recently bought iMovie to konw if my Panasonic x920 is compatible with it. I tried importing all my .mts files but iMovie cannot recognize this kind of file. We are wondering if anything simple workflow to help with this? This is a question that many AVCHD users may meet, why does it happens? The problem lies in the unsupported codec. AVCHD is a non-standard format that most NLE cannot accept. So in order to get theses Full HD AVCHD files from Panasonic HC-X920 to perfectly work with iMovie, we need to convert Panasonic AVCHD to iMovie native and preferred format like AIC .mov. 

I tested one MTS/M2TS Converter for Mac on the market with a single AVCHD .MTS clip from my Panasonic X920 Camcorder. The transcoding appeared to work fine. However, once I batch processed a number of clips together (about 3.5GB in total size), the resulting transcoded footage was choppy and not as good as the original sample I had tested.

While looking for the most reliable AVCHD converting tool to transcode HC-X920 recorded AVCHD videos to edit in iMovie, I find this Mac Panasonic AVCHD to iMovie Converter from Pavtube Studio, with which you are able to convert Panasonic HC-X920 AVCHD to AIC codec quickly, and easily make HC-X920 HD camcorder AVCHD video footage editable on iMovie on Mac. Below is a simple instruction for you to import and edit Panasonic HC-X920 MTS to iMovie on Mac. For those 3D lovers, do you want to change 3D MTS movies for playback?

See Also:
Free Mac MTS/M2TS Converter in App Store with FIVE stars

How to Transcode Panasonic HC-X920 AVCHD to iMovie for editing without rendering?
  
Step 1. Import HC-X920 MTS/M2TS files.
  
Click the add button to import the AVCHD resource files from X920 to Pavtube MTS/M2TS converter for Mac. Then the files will be listed on the file list tab, you can choose to check the properties of the video or preview it.

Pavtube MTS/M2TS converter for Mac

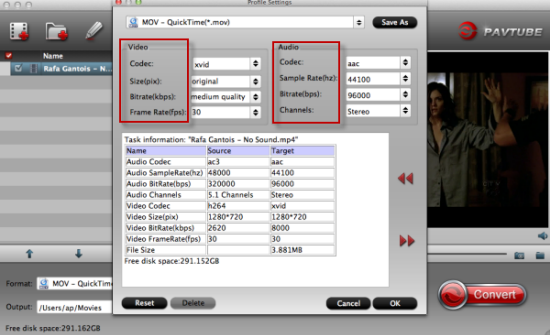
Step 2. Choose suitable output format for HC-X920 AVCHD to AIC conversion.
  
Click the format bar, and there will bemany output formats on the format list. You are recommended to choose "iMovie and Final Cut Express > Apple Intermediate Codec (AIC) (*.mov)".

Transcode HC-X920 AVCHD to AIC

Step 3. Convert Panasonic HC-X920 AVCHD video footages to iMovie.
  
Click the "Convert" button and start to transcode Panasonic HC-X920 AVCHD MTS/M2TS footage to AIC for iMovie.

When the conversion finished, you candirectly import the output AIC MOV files to iMovie for editing and make your movies. The importing needn’t any rendering because the AIC MOV isone of the compatible video formats in iMovie on Mac.

Related gudie:

Tips on Importing Panasonic HX-WA03 1080P Videos to FCP 7/X

Follow this guide you will know how to import Panasonic HX-WA03 1080p video to Final Cut Pro 7/X for editing with the best Panasonic MP4 to FCP Converter for Mac.

Panasonic HX-WA03 is the perfect travel companion for your next outdoor adventure or journey. This active lifestyle camcorder will work as hard as you and is ready to go anywhere. The HX-WA03 is waterproof, freezeproof, dustproof and is designed to fit firmly in your hand to deliver exceptional performance. Capture the tiniest details in 16-megapixel high-resolution still pictures and even 2-megapixel still images while recording a video by simply pressing the Photo Shooting Button.

Import Panasonic HX-WA03 Videos to FCP 7/X

The HX-WA03 renders images in breathtaking Full-HD (1920 x 1080)* beauty, so you can save your memories in stunning image quality and watch them on a big screen TV. It can shoot MP4 video with 1920 x 1080 pixels refers to video recordings with 1920 pixels in the horizontal direction and 1080 pixels in the vertical direction. It's great for us to take high quality images and record vivid full HD videos. 

If you have got the WA03 and use it to record 1080P video, you may have the need to edit WA03 MP4 in Final Cut Pro on Mac before sharing the videos with others. However, to tell you the truth, MP4 format is not easy to edit, many Mac users complained that they cannot load WA03 recorded MP4 videos in FCP smoothly, the main reason is the H.264 codec and MPEG-4 codec, which is not well accepted. 

FCP best supported video format is Apple ProRes 422 codec MOV format. To solve the incompatibility problem, the best method is to convert Panasonic WA03 MP4 footage to ProRes for editing in Final Cut Pro, now you can follow the steps below to transcode WA20 MP4 to FCP X for editing.

Read more:

To achieve this goal, Pavtube HD Video Converter for Mac is a program my friends recommended to me last year. I am working well with it, and you can try it yourself. With it, you are able to ingest Panasonic HX-WA03 mp4 videos into Final Cut Pro by encoding the MP4 to Apple ProRes 422 (HQ) codec, which is naturally supported by Final Cut Pro 6/7 and FCP X. 

Guide on Converting Panasonic WA03 MP4 footage to ProRes for using in FCP

Step 1. Add Source Videos
  
Launch the professional MP4 to Prores Converter, and then click “Add video” button to browse and load your source files. If you need to import an entire file folder directly, simply click “Add from folder” tab.

Step 2. Choose Output format
  
Go to “Format” menu and choose “Apple ProRes 422 (*.mov)” or "Apple Prores 422(HQ)(*.mov)" as target format from “Final Cut Pro” option to work fine with FCP 7/X. (You can also transcode MP4 footage for editing in iMovie)

MP4 to FCP Converter for Mac

Learn more Apple ProRes, please refer to Types of Apple ProRes Codecs

Tip: If you want to set some parameters for the output profile, you could click the “Settings” button to set the output bitrate, encode, frame rate, resolution, sample rate, channels, etc.


Step 3. Start Panasonic HX-WA03 MP4 to FCP Conversion


When the former steps finished, you can press “Convert” button to start rewrapping MP4 files from Panasonic WA03 to Apple ProRes MOV for FCP. Once the conversion process is done, click “Open” button to get the generated MOV files.

NOTE:
 The FCP X does not install the QuickTime Codecs automatically, so you need download and install the codec manually from here.

Step 4. Import the converted footages to FCP project


Launch the Final Cut Pro, choose from File menu > Import > Files… , you can follow this import video to fcp guide

In this way, you can effortlessly import and edit Panasonic WA03 MP4 files in Final Cut Pro smoothly.
  
P.S.
Need to convert more various formats besides MP4, or convert DVD and blu-ray movies for backup or further playback? Pavtube iMedia Converter for Mac can help you to accomplish both of them. It is integrated software for converting different videos, DVDs and blu-ray discs. Good news to you that you can get 20% discount at Pavtube Christmas Giveaway. Go to get it now.

See also: